Got This Recipe from Easie Peasie! Home-made finger paint for kids. Love it!! Taste test friendly for the little ones too.!

Home Made Playdoh!!

2 cups flour
2 cups warm water
1 cup salt
2 Tablespoons vegetable oil
1 Tablespoon cream of tartar (optional for improved elasticity)
food coloring (liquid, powder, or unsweetened drink mix)
scented oils
2 cups warm water
1 cup salt
2 Tablespoons vegetable oil
1 Tablespoon cream of tartar (optional for improved elasticity)
food coloring (liquid, powder, or unsweetened drink mix)
scented oils
Mix all of the ingredients together, and stir over low heat. The dough will begin to thicken until it resembles mashed potatoes.
When the dough pulls away from the sides and clumps in the center, as shown below, remove the pan from heat and allow the dough to cool enough to handle.
IMPORTANT NOTE: if your playdough is still sticky, you simply need to cook it longer!
Keep stirring and cooking until the dough is dry and feels like playdough.
I've gotten many comments asking about sticky dough, so please just keep cooking a bit longer and it will work!
Homemade Ice Cream in a Bag!

- 1 tablespoon sugar
- 1/2 cup milk or half & half
- 1/4 teaspoon vanilla
- 6 tablespoons rock salt
- 1 pint-size plastic food storage bag (e.g., Ziploc)
- 1 gallon-size plastic food storage bag
- Ice cubes
- Fill the large bag half full of ice, and add the rock salt. Seal the bag.
- Put milk, vanilla, and sugar into the small bag, and seal it.
- Place the small bag inside the large one, and seal it again carefully.
- Shake until the mixture is ice cream, which takes about 5 minutes.
- Wipe off the top of the small bag, then open it carefully. Enjoy!
A 1/2 cup milk will make about 1 scoop of ice cream, so double the recipe if you want more. Add flavorings, food color, and any yummy ice cream stuff and enjoy!
Homemade Crayons

I put the molds onto a cookie sheet, and put them in the oven at 250' for about 15 min. Set them out to cool for about 20 min. Gently pop them out of their molds for some festive crayons.
Homemade Soap Crayons!

Craft supplies you will need:
- Bowls
- Spoons
- Vegetable oil
- Cookie Cutters (Dollar Store)
- Cookie Sheet lined with wax paper
- 4 cups powdered baby detergent
- 1/2 cup of water
- Food coloring in different colors
Craft instructions:
Have the children pour 1 cup of detergent into a bowl.
Next, have the children add 2 tablespoons of water and a few drops of food coloring into the bowl, and mix.
Then, coat the children’s hands with oil. This prevents the soap from sticking to hands.
After that, have the children help make one inch thick mounds of soap. The mounds should be slightly larger than the cookie cutter.
Have the children spread oil along the inside of the cookie cutter. Then, cut the shapes out of the soap. We went with a night theme for ours – stars and moon.
When ready, help the children carefully remove the soap shapes from the cookie cutters and place on the cookie sheet.
Repeat the entire process again with another food color.
Lastly, allow soap shapes to harden for 24 hours.
Christmas Penguin Foot-print


Tools and Materials
Painted Sneakers How-To
Christmas Penguin Foot-print

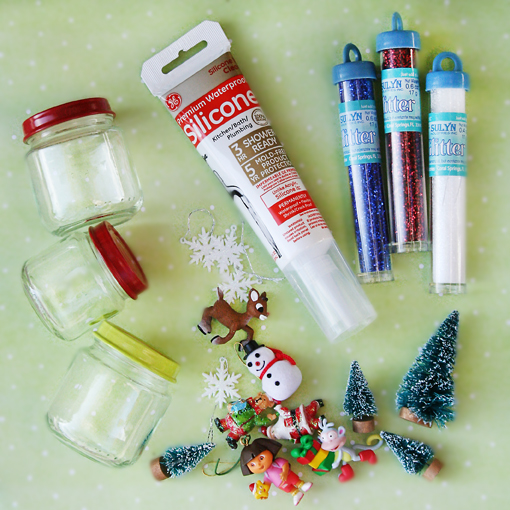
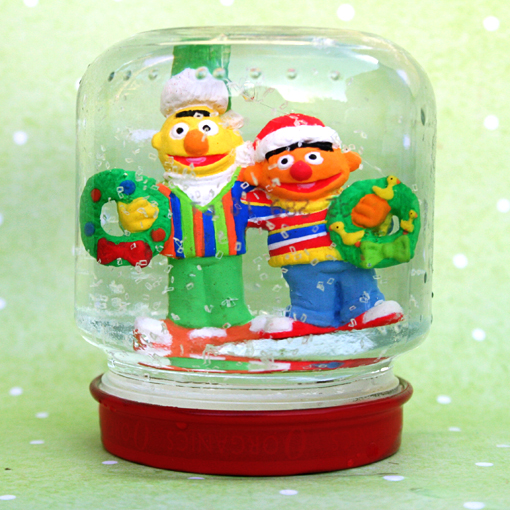
Today I wanted to share how to make Baby Food Snow Globes. They are definitely a favorite project in our house...and with a seven month old baby, I am always looking for ways to use my leftover baby food jars.
What you need:
• Baby food jars, (or any small jar for that matter)
• Plastic toys that will fit into your jar (I used small Christmas Ornaments)
• Glitter
• Silicone Sealant
• Glue Gun
• Water
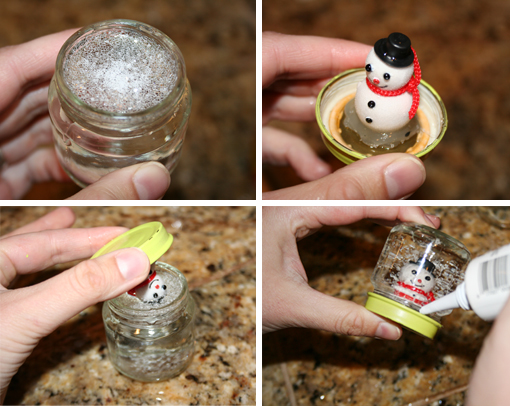
Step 1
Wash and dry your jar completely, including the lid.
Step 2
Attach figurine to the inside of jar lid using glue gun. Use your imagination, but make sure whatever you use is waterproof and won't dissolve. (tip: If you are using a small object, it's a good idea to build up the lid with extra hot glue or polymer clay so the object will appear taller.
Step 3
Fill jar almost to the top with cold water. Then sprinkle some glitter, or “ snow” into water.
Step 4
Line inside lip of the lid with silicone sealant (or hot glue if that is all you have). Then insert figurine in water and screw on lid. Do this over the sink, as the water overage will spill out. The higher you fill the jar, the less air bubbles will remain once you screw on the lid.
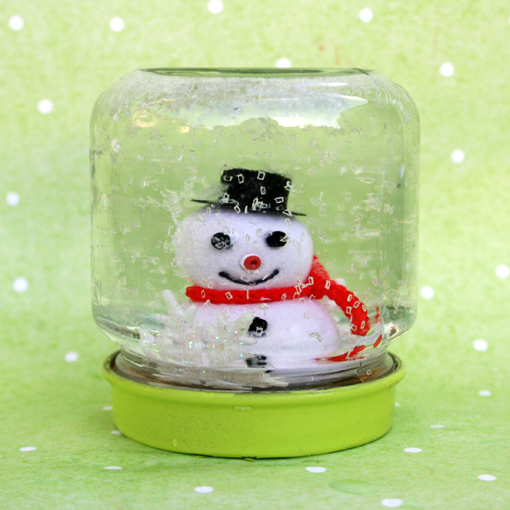
Step 5
Dry off your snow globe completely. Apply a layer of hot glue or silicon sealant around the rim of the lid to seal shut. Let stand and dry overnight.
Step 6
Shake your snow globe and enjoy!
bubble bath paint

My kids LOVED this. I mixed up some baby bubble bath/body wash with a little cornstarch and a little food colouring and they played in the tub forever. They had so much fun painting the walls and even painting themselves. I didn't have to worry about them painting themselves either because I made this with gentle, tear-free, baby wash. It only took minutes to make too, which is always a bonus. Don't worry about this staining your tub walls either. I have white tiles and grout and it washed off very easily. Try this out with your kiddos, they'll love you for it! Here's the 'recipe':
What you'll need (this was enough to make 4 containers):
1 cup baby bubble bath or body wash - as long as it is clear/white
4 tbsp cornstarch
a few drops of food colouring
small containers with lids
Directions:
1. in a mixing bowl mix together your bubble bath and cornstarch
2. pour this mixture into 4 small containers
3. pour a couple drops (you only want to use a couple drops so it won't stain) of food colouring in each container and mix well
4. your kids can use either paintbrushes or their hands to have fun in the tub
5. when you're done, snap on the lid and they're ready to go for next time
Bathtime Paints !

The Palette: A muffin tin with shaving cream squirted into each cup and mixed with a different color or colors food coloring
The Brush: An old basting brush from my kitchen.
The Easel: Our bathroom shower tiles
The Easel: Our bathroom shower tiles

Paint your Own Umbrella

Totally love this idea!
You will need a kid's nylon umbrella (paint won't stick to a plastic one), paintbrushes, and permanent waterproof paint, such as fabric paint or acrylic. Follow the manufacturer's directions: Some fabric paints require the addition of fixative; others require ironing the umbrella after painting. Carefully cover the work surface with newspaper before you begin, and have your child wear a smock. Once finished, keep the umbrella open overnight; the paint must dry completely before you close it or use it.
Painted Sneakers, what!

Newspaper
Clean canvas sneakers
Fabric or acrylic craft paint
Artist paintbrushes
Fabric paint pens
1. Cover a work surface with newspaper.
2. Using fabric paints and paint pens, decorate sneakers.
3. Let paint dry for 24 hours before painting another shade on top of the original color.